You are here:

Defender Sensors

Your sensors monitor specific conditions and issue alerts when selected event occurs. 

Watch the videos to familiarize yourself with the sensors and the activation process.

Important Things to Know Before You Start

Get the Meshify Protect App

Meshify Protect App is a core part of the sensor experience; using the app, you’ll activate devices, monitor your location, and add notification contacts for alerts.
  1. Download the Meshify Protect™️ App for iOS or Android
  2. If this is your first time using the app, set up your account by logging in with the email on file for the location(s) you are assigned to. You may be asked to sign a Participation Agreement and will be instructed to add Notification Contacts.
  3. On the welcome screen, tap ‘Devices’ (or ‘Locations’ > pick the correct location from the list) to start the activation process for the desired location.
    Note: If this is an additional device for an existing location, you can add it by tapping  in the devices tab.
  4. If you have multiple devices available for setup, start with a Gateway.
  5. When instructed, scan the QR code on the back of the device
  6. Follow the in-app instructions to complete activation
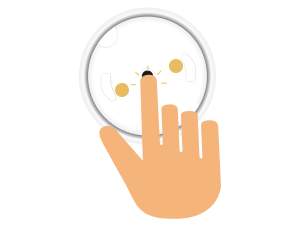
Placement Suggestions

Sensor placement will vary based on the selected solution (i.e. potential risks) you choose to monitor. The Protect app will show you detailed instructions based on your selection. 

For Defender Leak Sensors, your options will be:

    • Water
    • Refrigerator
    • Pipe Freeze (Temperature Probe required)
For Defender Temp Sensors, your options will be:
    • Room Temperature
    • Refrigerator
    • Cold Storage
    • Freeze
    • Pipe Freeze (Temperature Probe required)
Note: Once you have determined solution and placement, take the sensor to that location before powering it on. 

Activation Overview

When instructed:

  1. Press down firmly on the button for 2 to 4 seconds (or until you hear a beep) and release the button. Button will blink purple as the sensor begins to activate. Tap Next.
  2. Review device connection within the Protect app.
  3. Place device in preferred location.
    Optional: Attach accessories and mounting brackets, as needed.
  4. Add device location information and photo to the app to easily locate in the future.

Next steps 

  • Finish setup of your sensors in the Protect app, including confirming device online status and device location. 
  • Once you are done, complete activation process to protect and monitor your location.

FAQ

Meshify Defender Leak and Temp Sensors are powered by 2 Lithium AA batteries. The batteries are designed to last up to 5 years under normal operating conditions. These batteries are easily replaceable.

Low signal may impact battery life and sensor connectivity. To improve signal:

  • Check the area for items that may block the signal, such as large metallic objects, refrigeration units, or areas with high signal interference (i.e. network closets), and make sure they are not between the sensor and the gateway.

  • Move closer to the gateway and press the button for 2-4 seconds (or until you hear a beep) to recheck signal. Button will flash purple up to 40 seconds, followed by either:
    • Three beeps and green blinking light for good signal
    • Three beeps and blinking yellow light for ok signal
    • Long tone and red blinking light which indicates poor signal
  • Remove the sensor cover by twisting the base until the unlock icon on the bottom of the sensor is aligned with the notch near it.
  • Check that the batteries are inserted correctly, and contact points are clean (try rolling the batteries inside the battery compartment).
    Connect the sensor again by pressing the button for 2-4 seconds (or until you hear a beep).
  • If batteries are still showing low, replace both batteries with two new Lithium AA size batteries, and reconnect the sensor.
  • After replacing batteries, if you are still having issues, please contact Sensor Support for further assistance.

Note: Please do not use regular akaline or rechargeable batteries, which will cause the sensor to underperform.

  • Press the button for 2-4 seconds (or until you hear a beep) and release the button to attempt connection. Button will flash purple for up to 40 seconds.
    • A long tone and red solid light indicates a failure to connect.
    • You can retry connecting by 1) moving closer to the gateway and/or 2) moving objects away that may be creating  signal interference,  and pressing the button for 2-4 seconds again.
    • If the sensor is still unable to connect, it will enter power saving mode. Please contact Sensor Support for further assistance.
  • If the lights aren’t turning on, or the beep isn’t occurring, you may need to replace the battery 

If you require further assistance, please contact Sensor Support at (844) 468-1866 or sensorsupport@hsb.com – Monday to Friday, 8am – 8pm Eastern Time